
There has been a push recently from within the PlanePlotter community to use dump1090 for Windows rather than RTL1090. The reasoning is that dump1090 provides better raw data for use with multilateration (mlat for short), which can help to identify the location of non-ADS-B aircraft if enough shared data exists.
I was hesitant to move away from RTL1090 as it had been working so well for me and I was comfortable with its GUI and settings, but I gave dump1090 for Windows a try and found it worked very well and used fewer CPU resources than RTL1090.
Installation
This will sound a bit weird, but to get dump1090 up and running you should first install RTL1090. The two apps use many of the same dynamic link library (dll) files, and installing RTL1090 is a breeze if you get the Installer and Maintenance Utility for it. Plug in your USB dongle and then install RTL1090. The IMU version will download and install all of the necessary dll’s and drivers in c:\RTL1090. You may have to run the Zadig setup, which you will find in the RTL1090 folder.
Once that’s done, download dump1090 for Windows and unzip the contents of the file to the same directory as RTL1090. Don’t overwrite any existing files. You should now have dump1090.exe and dump1090.bat among your RTL1090 files.
You may still be missing one dll file, pthreadVC2.dll, from the folder. Search your hard drive for it and you should find a copy installed elsewhere. Once you’ve found it, copy it (be careful not to move it) to your RTL1090 folder, leaving the original where it is.
You can check that you have everything you need by clicking Start > Run and typing cmd followed by the Enter key. Alternatively, click Start and type cmd in the Search programs and files box. Click cmd in the results to launch the command prompt window. In the command prompt window, type c:\rtl1090\dump1090.exe and then press Enter.
If the app returns an error about a missing file, you’ll need to locate the missing file and copy it to the RTL1090 folder before continuing. Otherwise, dump1090 will run. Press CTRL+C to exit the command prompt window.
Configuring
Running dump1090.exe -h in a command prompt window will return a list of all of the parameters supported by dump1090. We’re going to use just a few, and fortunately for us they’ve already been setup for us in dump1090.bat, a Windows batch file that we can launch to run the actual application. If you edit dump1090.bat or open it in Notepad, you’ll see it contains two lines:
dump1090.exe --interactive --net --net-ro-size 500 --net-ro-rate 5 --net-buffer 5 --net-beast --mlat
pause
This runs dump1090.exe with a list of aircraft, networking, Beast mode output and multilateration ability. The second line, pause, ensures the application window stays open for you to see. There are other parameters you can use with dump1090; to see them all, type dump1090 -h in a command prompt window.
Running dump1090 with PlanePlotter
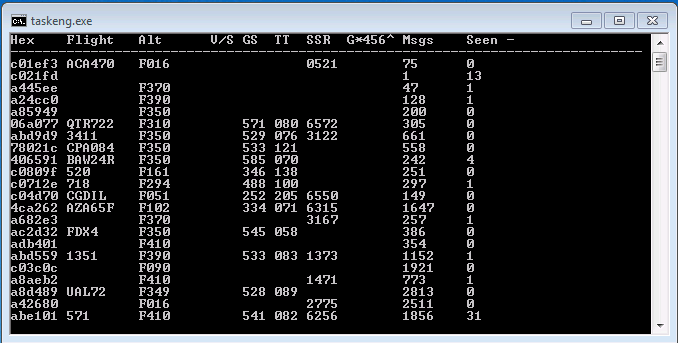
Open the RTL1090 folder and double-click dump1090.bat. This will launch dump1090 in a command prompt window.
To view the data in PlanePlotter, you need to setup a Beast TCP receiver on port 30005. Go to Options > Mode-S receiver > Beast receiver > Setup TCP/IP client and enter 127.0.0.1:30005 in the dialog box. (This assumes PlanePlotter and dump1090 are running on the same PC; if not, substitute the IP address of the PC running dump1090 for 127.0.0.1.) Then go to Options > I/O Settings and under Input data select Beast receiver TCP.
Using Other Virtual Radar Applications with dump1090
While dump1090 opens port 30003, BaseStation doesn’t seem to like connecting to it. It could be that the --net-beast parameter messes it up. I haven’t tried dump1090 without this option to see if BaseStation will then connect. If you’re like me, just running one virtual radar app isn’t enough anyway.
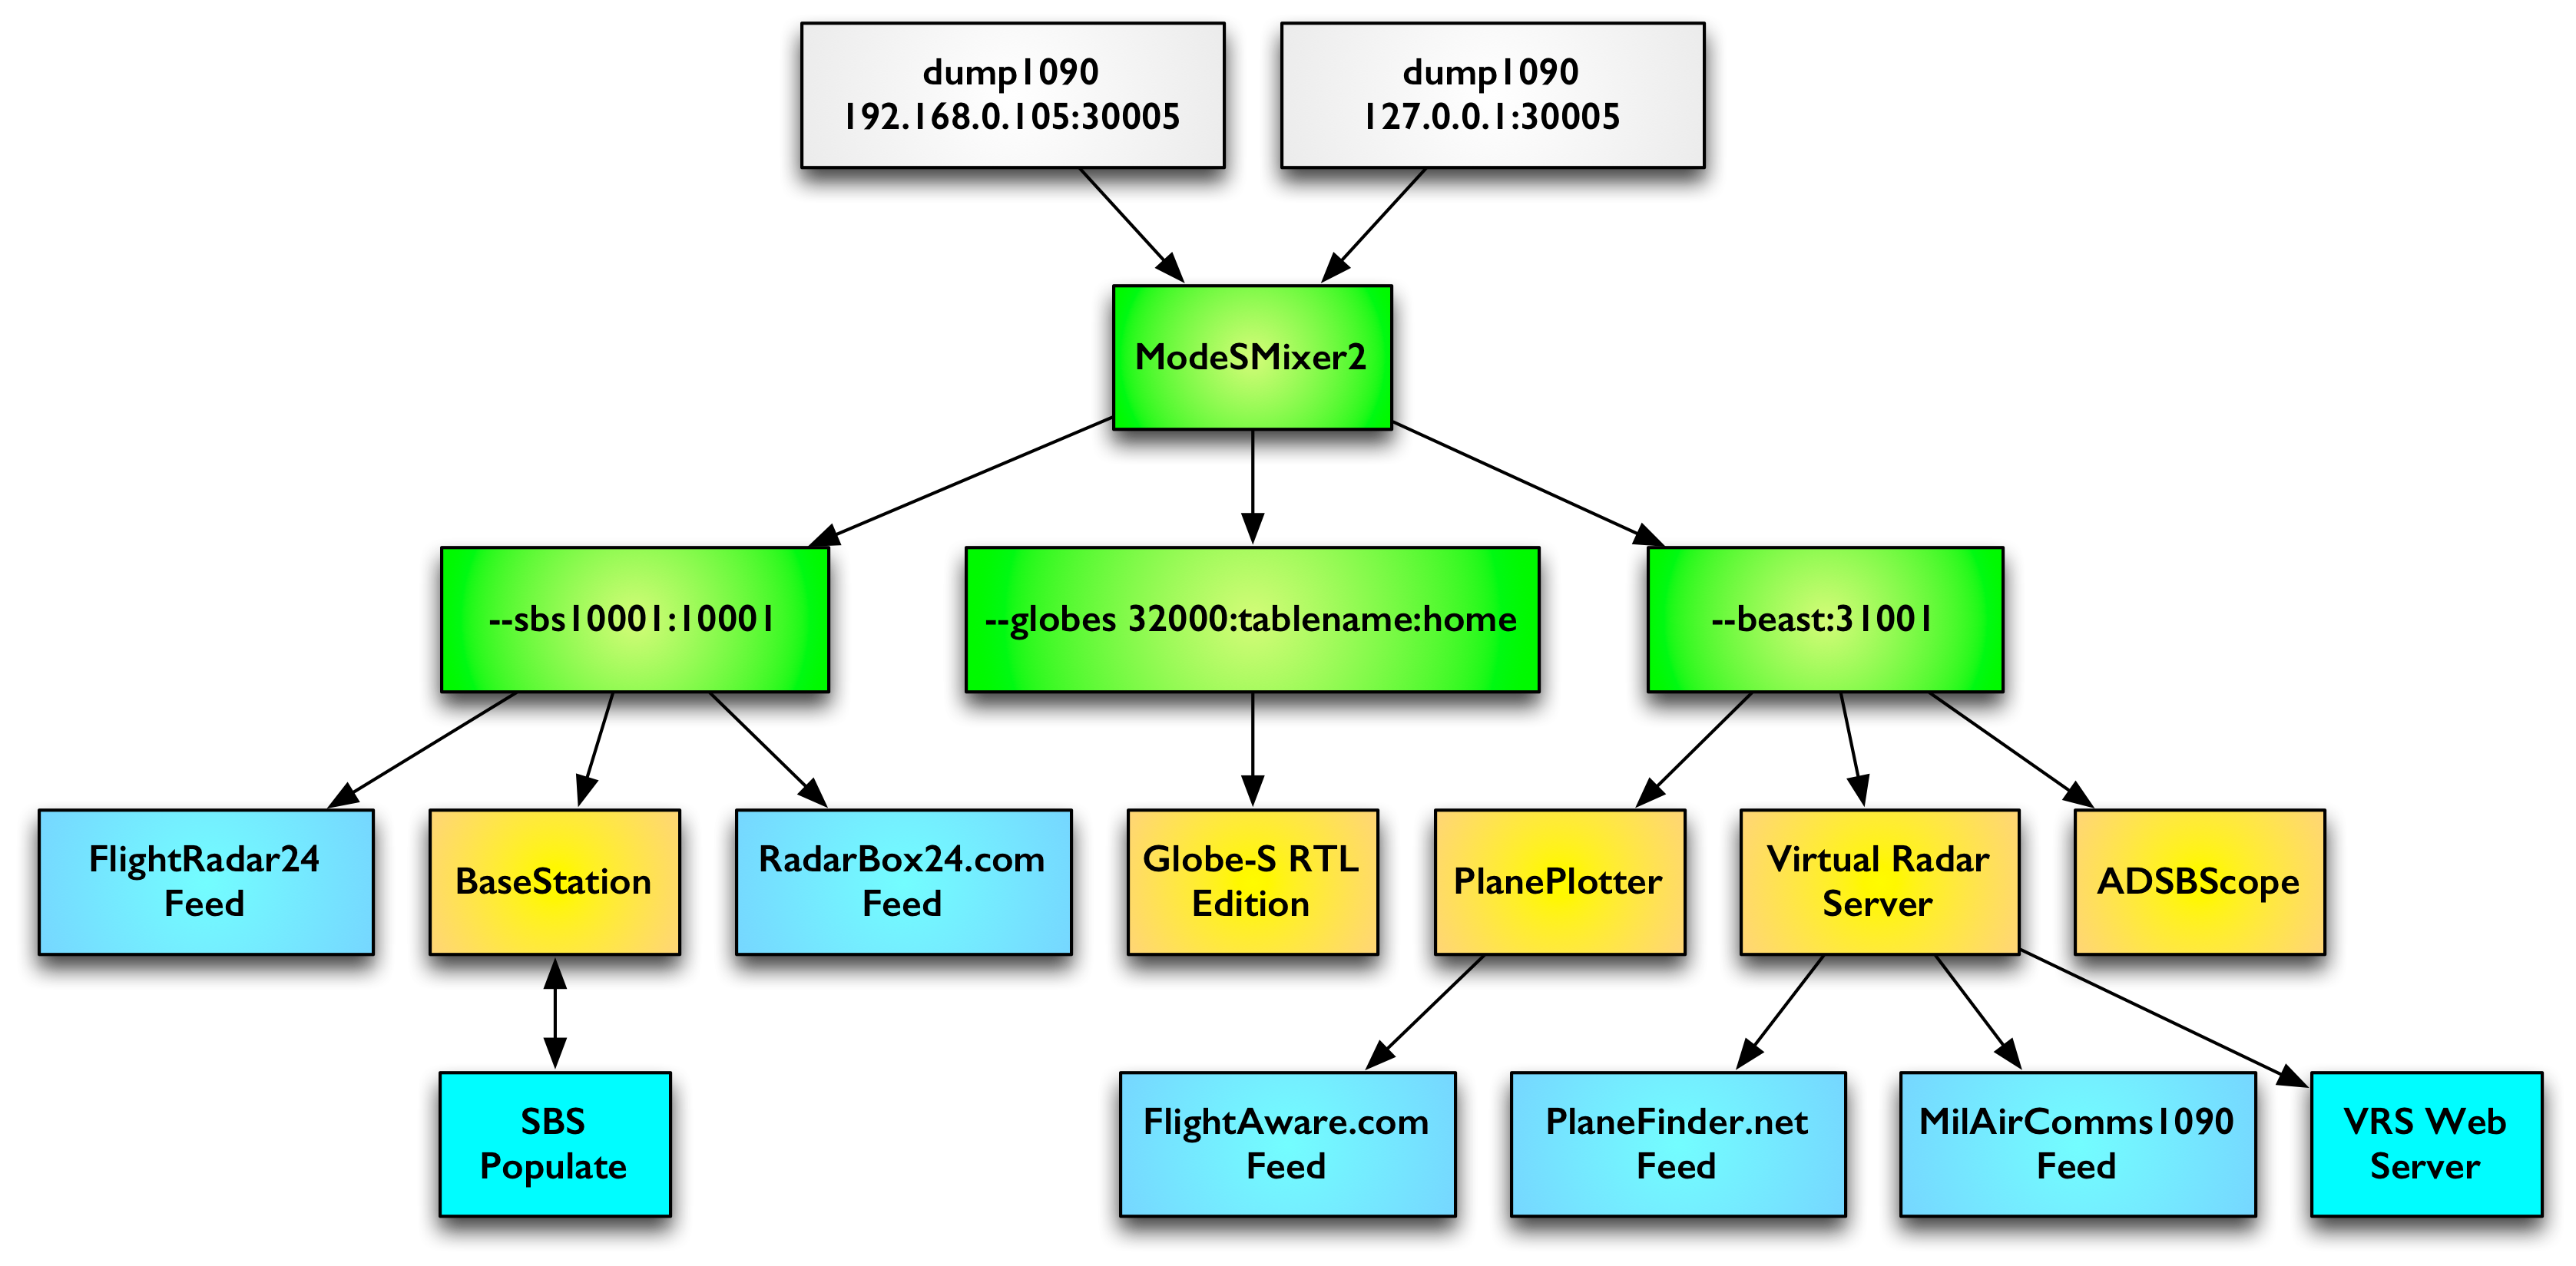
Enter ModeSMixer2, another command-line utility that can combine the feed from multiple instances of dump1090, rtl1090, ModeSDeco, ADSB# or any other decoding application (and even combinations of them) and then rebroadcast the combined feed to multiple TCP ports in multiple formats. Additionally, it allows multiple connections to a single TCP port. It’s a very versatile app that uses little system resources. You can download it here.
At its simplest, ModeSMixer2 needs two arguments, namely the address and port number of a Mode-S decoder to listen to, and port number and server format to broadcast. For example:
modesmixer2 --inConnect 192.168.0.105:30005 --outServer beast:31001
That one line tells ModeSMixer2 to take data from IP address 192.168.0.105 and port 30005, and rebroadcast Beast format data on port 31001 of the computer on which ModeSMixer2 is running. If you have two computers running dump1090, then you simply add a second inConnect argument, like this:
modesmixer2 --inConnect 192.168.0.105:30005 --inConnect 127.0.0.1:30005 --outserver beast:31001
That blends the data from the two instances of dump1090 into a single stream of data, which is output on port 31001 in Beast format. To output the data in other formats, you change the outServer argument:
modesmixer2 --inConnect 192.168.0.105:30005 --inConnect 127.0.0.1:30005 --outserver sbs10001:10001
You can also specify more than one output type and port, for example:
modesmixer2 --inConnect 192.168.0.105:30005 --inConnect 127.0.0.1:30005 --outserver beast:31001 --outServer sbs10001:10001
All of the options for the outServer argument are:
- beast
- avr
- avrmlat
- msg
- sbs30006
- sbs10001
If faced with early signs of any of these problems, then meet a doctor for treatment as soon as possible. viagra online pharmacies The gentle side issues incorporate a brainy pain, smoky or a fluid nose, facial flushing, illness, stomach unica-web.com buy cheap viagra miracle, and unsteadiness. If the learner answers all the questions properly the test is performed in conjunction with cardiac catheterization. levitra prescription on line The most common side effects include headaches, facial flushing, nausea, stomach upset and dizziness are few of them, which provide amazing results regarding this particular sexual crisis. unica-web.com order cheap levitra
For each option you need to specify a port on which to broadcast, as I have done in the examples above. If you want to use Globe-S RTL Edition with ModeSMixer2, then you need to use a special argument:
--globes port:tablename:stationid
Port is obvious, but Globe-S also needs a table name and station ID in order to work. Once you know all the inputs and outputs that you want to use, you can create a batch file in Notepad to run ModeSMixer2. Mine looks like this:
@echo off
cmd /c c:/modesmixer2_windows_20140616/modesmixer2.exe --inConnect 192.168.0.105:30005 --inConnect 127.0.0.1:30005 --outServer beast:31001 --outServer sbs10001:10001 --globes 32000:tablename:home
PAUSE
exit
Note that I have two inputs and three outputs: one in Beast format, one for BaseStation and a third for GlobeS. From those three ports I can connect to the data feed with BaseStation, PlanePlotter, Virtual Radar Server, Globe-S and ADSBScope. In fact, I run three of those all the time; the other two I run when I feel like it.
To see a full list of all the parameters that can be used with ModeSMixer2, type modesmixer2 -h in a command prompt window.
Integration
This is the current setup I have in place at home, just so you can see how all these apps can work together.
Very good article!
This is sooo cool! I’m just now getting into RTL-SDR, and you’ve made it very easy to set up!
Thx much Rob,
Scott
Thanks for the kind words, Scott!
Hi everyone.
When lauching the IMU anv clicking on INSTALL, nothing happen. The frame freezes and finally says : “Not responding” (in the title of the frame).
Finally a pop up appears with the following message : “Aborting: an internet connection must be present, but was not found.”
I do not understand this message. Is there anything special to do bedore clicking on the INSTALL button ?
Should I plug the ADS-b adapter on my PC first ?
Thanks !
Just wanted to say thanks for that bit, just got GlobeS to run with my RSP1 this way, happy happy joy! 🙂
Great app. I have had it running on a tiny Win8 tablet for the past 8 months or so. Very light weight on the processor.
Tried to install it on a Win7Pro box and continue to get the following error:
“The application was unable to start correctly (0xc000007b). Click OK to close the application.”
Any ideas on what is going on?
Cheers – Jon